
FFmpeg Tutorial
FFmpeg_Tutorial
FFmpeg工具和sdk库的使用demo
github link (https://github.com/MagicConch17/FFmpeg_Tutorial)[https://github.com/MagicConch17/FFmpeg_Tutorial]
一、使用FFmpeg命令行工具和批处理脚本进行简单的音视频文件编辑
1、基本介绍
对于每一个从事音视频技术开发的工程师,想必没有一个人对FFmpeg这个名称感到陌生。FFmpeg是一套非常知名的音视频处理的开源工具,它包含了开发完成的工具软件、封装好的函数库以及源代码供我们按需使用。FFmpeg提供了非常强大的功能,可以完成音视频的编码、解码、转码、视频采集、后处理(抓图、水印、封装/解封装、格式转换等),还有流媒体服务等诸多功能,可以说涵盖了音视频开发中绝大多数的领域。原生的FFmpeg是在Linux环境下开发的,但是通过各种方法(比如交叉编译等)可以使它运行在多种平台环境上,具有比较好的可移植性。
FFmpeg项目的官方网址为:https://ffmpeg.org/。在它的官网上我们可以找到许多非常有用的内容,如项目的简介、版本更新日志、库和源代码的地址、使用文档等信息。官方的使用文档是我们在开发时必不可少的信息来源,其重要性不言而喻。除了官方网站以外,我们下载的FFmpeg的程序包中也有使用参考文档的离线版本。
2、FFmpeg组成
构成FFmpeg主要有三个部分,第一部分是四个作用不同的工具软件,分别是:ffmpeg.exe,ffplay.exe,ffserver.exe和ffprobe.exe。
- ffmpeg.exe:音视频转码、转换器
- ffplay.exe:简单的音视频播放器
- ffserver.exe:流媒体服务器
- ffprobe.exe:简单的多媒体码流分析器
第二部分是可以供开发者使用的SDK,为各个不同平台编译完成的库。如果说上面的四个工具软件都是完整成品形式的玩具,那么这些库就相当于乐高积木一样,我们可以根据自己的需求使用这些库开发自己的应用程序。这些库有:
- libavcodec:包含音视频编码器和解码器
- libavutil:包含多媒体应用常用的简化编程的工具,如随机数生成器、数据结构、数学函数等功能
- libavformat:包含多种多媒体容器格式的封装、解封装工具
- libavfilter:包含多媒体处理常用的滤镜功能
- libavdevice:用于音视频数据采集和渲染等功能的设备相关
- libswscale:用于图像缩放和色彩空间和像素格式转换功能
- libswresample:用于音频重采样和格式转换等功能
第三部分是整个工程的源代码,无论是编译出来的可执行程序还是SDK,都是由这些源代码编译出来的。FFmpeg的源代码由C语言实现,主要在Linux平台上进行开发。FFmpeg不是一个孤立的工程,它还存在多个依赖的第三方工程来增强它自身的功能。在当前这一系列的博文/视频中,我们暂时不会涉及太多源代码相关的内容,主要以FFmpeg的工具和SDK的调用为主。到下一系列我们将专门研究如何编译源代码并根据源代码来进行二次开发。
3、FFMpeg工具的下载和使用
(1)FFmpeg工具的下载:
在官网上我们可以找到”Download”页面,该页上可以下载FFmpeg的工具、库和源代码等。在选择”Windows Packages”下的Windows Builds后,会跳转到Windows版本的下载页面:
在下载页面上,我们可以看到,对于32位和64位版本,分别提供了三种不同的模式:static、shared和dev
- static: 该版本提供了静态版本的FFmpeg工具,将依赖的库生成在了最终的可执行文件中;作为工具而言此版本就可以满足我们的需求;
- share: 该版本的工具包括可执行文件和dll,程序运行过程必须依赖于提供的dll文件;
- dev: 提供了库的头文件和dll的引导库;
(2)ffplay.exe的使用
ffplay是一个极为简单的音视频媒体播放器。ffplay.exe使用了ffmpeg库和SDL库开发成的,可以用作FFmpeg API的测试工具。
ffplay的使用方法,最简单的是直接按照默认格式播放某一个音视频文件或流:
ffplay.exe -i ../video/IMG_0886.MOV
除此之外,ffplay还支持传入各种参数来控制播放行为。比较常用的参数有:
- -i input_file:输入文件名
- -x width -y height:控制播放窗口的宽高
- -t duration:控制播放的时长
- -window_title title:播放窗口的标题,默认为输入文件名
- -showmode mode:设置显示模式,0:显示视频;1:显示音频波形;2:显示音频频谱
- -autoexit:设置视频播放完成后自动退出
其他参数可以参考官网的文档:https://www.ffmpeg.org/ffplay.html或下载包里的文档
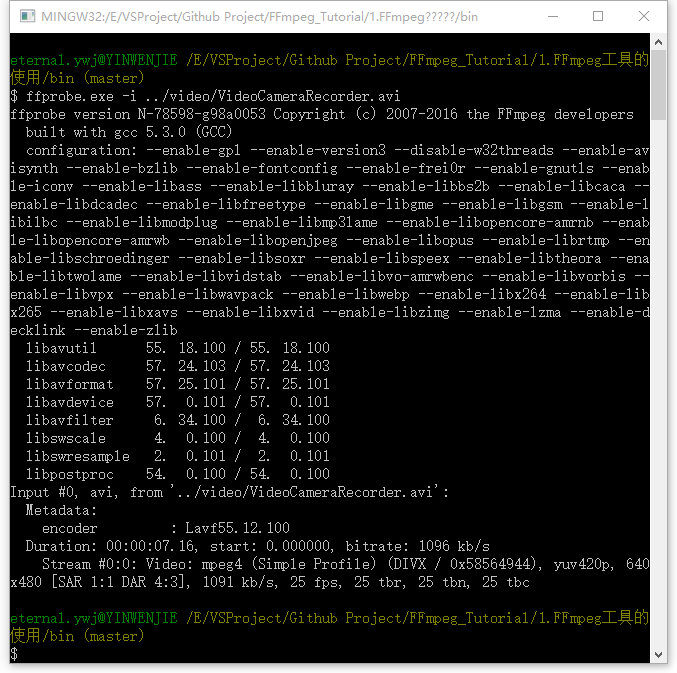
(3)ffprobe的使用
ffprobe可以提供简单的音视频文件分析功能。最简单的方法同ffplay类似:
ffprobe.exe -i ../video/IMG_0886.MOV
分析完成后,ffprobe会显示音视频文件中包含的每个码流的信息,包括编码格式、像素分辨率、码率、帧率等信息:
(4)ffmpeg的使用
ffmpeg.exe可谓是整个工程的核心所在,它的主要功能是完成音视频各种各样的转换操作。
视频转码:ffmpeg.exe可以将视频文件由原格式转换为其他格式,如从avi转为mp4等:
ffmpeg -i ../video/IMG_0886.MOV ../video/output_mpeg4_mp3.avi
这里,ffmpeg默认将视频编码格式选择为mpeg4,音频转码格式为mp3。如果我们希望保留原始编码,需要增加参数-c copy,表明不做任何转码操作:
ffmpeg -i ../video/IMG_0886.MOV -c copy ../video/output_copy.avi
如果我们希望将视频转换为其他编码格式,则需要在参数中指定目标格式-c:v libx265或-vcodec libx265。ffmpeg支持的所有编码器格式可以通过以下命令查看:
ffmpeg.exe -encoders
实际操作:
ffmpeg -i ../video/IMG_0886.MOV -c:v mjpeg ../video/output_mjpeg.avi
视频解封装:ffmpeg可以将视频中的音频和视频流分别提取出来。需要在命令行中添加参数-an和-vn,分别表示屏蔽音频和视频流:
@REM 提取视频流
ffmpeg -i ../video/IMG_0886.MOV -c:v copy -an ../video/IMG_0886_v.MOV
@REM 提取音频流
ffmpeg -i ../video/IMG_0886.MOV -c:a copy -vn ../video/IMG_0886_a.aac
视频截取:使用ffmpeg命令并指定参数-ss和-t,分别表示截取开始时刻和截取时长
@REM 视频截取
ffmpeg -ss 5 -t 5 -i ../video/IMG_0886.MOV -c copy ../video/IMG_0886_cut.MOV
二、调用FFmpeg SDK对YUV视频序列进行编码
视频由像素格式编码为码流格式是FFMpeg的一项基本功能。通常,视频编码器的输入视频通常为原始的图像像素值,输出格式为符合某种格式规定的二进制码流。
1、FFMpeg进行视频编码所需要的结构:
- AVCodec:AVCodec结构保存了一个编解码器的实例,实现实际的编码功能。通常我们在程序中定义一个指向AVCodec结构的指针指向该实例。
- AVCodecContext:AVCodecContext表示AVCodec所代表的上下文信息,保存了AVCodec所需要的一些参数。对于实现编码功能,我们可以在这个结构中设置我们指定的编码参数。通常也是定义一个指针指向AVCodecContext。
- AVFrame:AVFrame结构保存编码之前的像素数据,并作为编码器的输入数据。其在程序中也是一个指针的形式。
- AVPacket:AVPacket表示码流包结构,包含编码之后的码流数据。该结构可以不定义指针,以一个对象的形式定义。
在我们的程序中,我们将这些结构整合在了一个结构体中:
/*************************************************
Struct:            CodecCtx
Description:    FFMpeg编解码器上下文
*************************************************/
typedef struct
{
    AVCodec            *codec;        //指向编解码器实例
    AVFrame            *frame;        //保存解码之后/编码之前的像素数据
    AVCodecContext    *c;            //编解码器上下文,保存编解码器的一些参数设置
    AVPacket        pkt;        //码流包结构,包含编码码流数据
} CodecCtx;
2、FFMpeg编码的主要步骤:
(1)、输入编码参数
这一步我们可以设置一个专门的配置文件,并将参数按照某个事写入这个配置文件中,再在程序中解析这个配置文件获得编码的参数。如果参数不多的话,我们可以直接使用命令行将编码参数传入即可。
(2)、按照要求初始化需要的FFMpeg结构
首先,所有涉及到编解码的的功能,都必须要注册音视频编解码器之后才能使用。注册编解码调用下面的函数:
avcodec_register_all();
编解码器注册完成之后,根据指定的CODEC_ID查找指定的codec实例。CODEC_ID通常指定了编解码器的格式,在这里我们使用当前应用最为广泛的H.264格式为例。查找codec调用的函数为avcodec_find_encoder,其声明格式为:
AVCodec *avcodec_find_encoder(enum AVCodecID id);
该函数的输入参数为一个AVCodecID的枚举类型,返回值为一个指向AVCodec结构的指针,用于接收找到的编解码器实例。如果没有找到,那么该函数会返回一个空指针。调用方法如下:
/* find the mpeg1 video encoder */
ctx.codec = avcodec_find_encoder(AV_CODEC_ID_H264);    //根据CODEC_ID查找编解码器对象实例的指针
if (!ctx.codec)
{
    fprintf(stderr, "Codec not found\n");
    return false;
}
AVCodec查找成功后,下一步是分配AVCodecContext实例。分配AVCodecContext实例需要我们前面查找到的AVCodec作为参数,调用的是avcodec_alloc_context3函数。其声明方式为:
AVCodecContext *avcodec_alloc_context3(const AVCodec *codec);
其特点同avcodec_find_encoder类似,返回一个指向AVCodecContext实例的指针。如果分配失败,会返回一个空指针。调用方式为:
ctx.c = avcodec_alloc_context3(ctx.codec);            //分配AVCodecContext实例
if (!ctx.c)
{
    fprintf(stderr, "Could not allocate video codec context\n");
    return false;
}
需注意,在分配成功之后,应将编码的参数设置赋值给AVCodecContext的成员。
现在,AVCodec、AVCodecContext的指针都已经分配好,然后以这两个对象的指针作为参数打开编码器对象。调用的函数为avcodec_open2,声明方式为:
int avcodec_open2(AVCodecContext *avctx, const AVCodec *codec, AVDictionary **options);
该函数的前两个参数是我们刚刚建立的两个对象,第三个参数为一个字典类型对象,用于保存函数执行过程总未能识别的AVCodecContext和另外一些私有设置选项。函数的返回值表示编码器是否打开成功,若成功返回0,失败返回一个负数。调用方式为:
if (avcodec_open2(ctx.c, ctx.codec, NULL) < 0)        //根据编码器上下文打开编码器
{
    fprintf(stderr, "Could not open codec\n");
    exit(1);
}
然后,我们需要处理AVFrame对象。AVFrame表示视频原始像素数据的一个容器,处理该类型数据需要两个步骤,其一是分配AVFrame对象,其二是分配实际的像素数据的存储空间。分配对象空间类似于new操作符一样,只是需要调用函数av_frame_alloc。如果失败,那么函数返回一个空指针。AVFrame对象分配成功后,需要设置图像的分辨率和像素格式等。实际调用过程如下:
ctx.frame = av_frame_alloc();                        //分配AVFrame对象
if (!ctx.frame)
{
    fprintf(stderr, "Could not allocate video frame\n");
    return false;
}
ctx.frame->format = ctx.c->pix_fmt;
ctx.frame->width = ctx.c->width;
ctx.frame->height = ctx.c->height;
分配像素的存储空间需要调用av_image_alloc函数,其声明方式为:
int av_image_alloc(uint8_t *pointers[4], int linesizes[4], int w, int h, enum AVPixelFormat pix_fmt, int align);
该函数的四个参数分别表示AVFrame结构中的缓存指针、各个颜色分量的宽度、图像分辨率(宽、高)、像素格式和内存对其的大小。该函数会返回分配的内存的大小,如果失败则返回一个负值。具体调用方式如:
ret = av_image_alloc(ctx.frame->data, ctx.frame->linesize, ctx.c->width, ctx.c->height, ctx.c->pix_fmt, 32);
if (ret < 0)
{
    fprintf(stderr, "Could not allocate raw picture buffer\n");
    return false;
}
(3)、编码循环体
到此为止,我们的准备工作已经大致完成,下面开始执行实际编码的循环过程。用伪代码大致表示编码的流程为:
while (numCoded < maxNumToCode)
{
    read_yuv_data();
    encode_video_frame();
    write_out_h264();
}
其中,read_yuv_data部分直接使用fread语句读取即可,只需要知道的是,三个颜色分量Y/U/V的地址分别为AVframe::data[0]、AVframe::data[1]和AVframe::data[2],图像的宽度分别为AVframe::linesize[0]、AVframe::linesize[1]和AVframe::linesize[2]。需要注意的是,linesize中的值通常指的是stride而不是width,也就是说,像素保存区可能是带有一定宽度的无效边区的,在读取数据时需注意。
编码前另外需要完成的操作时初始化AVPacket对象。该对象保存了编码之后的码流数据。对其进行初始化的操作非常简单,只需要调用av_init_packet并传入AVPacket对象的指针。随后将AVPacket::data设为NULL,AVPacket::size赋值0.
成功将原始的YUV像素值保存到了AVframe结构中之后,便可以调用avcodec_encode_video2函数进行实际的编码操作。该函数可谓是整个工程的核心所在,其声明方式为:
int avcodec_encode_video2(AVCodecContext *avctx, AVPacket *avpkt, const AVFrame *frame, int *got_packet_ptr);
其参数和返回值的意义:
- avctx: AVCodecContext结构,指定了编码的一些参数;
- avpkt: AVPacket对象的指针,用于保存输出码流;
- frame:AVframe结构,用于传入原始的像素数据;
- got_packet_ptr:输出参数,用于标识AVPacket中是否已经有了完整的一帧;
- 返回值:编码是否成功。成功返回0,失败则返回负的错误码
通过输出参数*got_packet_ptr,我们可以判断是否应有一帧完整的码流数据包输出,如果是,那么可以将AVpacket中的码流数据输出出来,其地址为AVPacket::data,大小为AVPacket::size。具体调用方式如下:
/* encode the image */
ret = avcodec_encode_video2(ctx.c, &(ctx.pkt), ctx.frame, &got_output);    //将AVFrame中的像素信息编码为AVPacket中的码流
if (ret < 0)
{
    fprintf(stderr, "Error encoding frame\n");
    exit(1);
}

if (got_output)
{
    //获得一个完整的编码帧
    printf("Write frame %3d (size=%5d)\n", frameIdx, ctx.pkt.size);
    fwrite(ctx.pkt.data, 1, ctx.pkt.size, io_param.pFout);
    av_packet_unref(&(ctx.pkt));
}
因此,一个完整的编码循环提就可以使用下面的代码实现:
/* encode 1 second of video */
for (frameIdx = 0; frameIdx < io_param.nTotalFrames; frameIdx++)
{
    av_init_packet(&(ctx.pkt));                //初始化AVPacket实例
    ctx.pkt.data = NULL;                    // packet data will be allocated by the encoder
    ctx.pkt.size = 0;

    fflush(stdout);

    Read_yuv_data(ctx, io_param, 0);        //Y分量
    Read_yuv_data(ctx, io_param, 1);        //U分量
    Read_yuv_data(ctx, io_param, 2);        //V分量

    ctx.frame->pts = frameIdx;

    /* encode the image */
    ret = avcodec_encode_video2(ctx.c, &(ctx.pkt), ctx.frame, &got_output);    //将AVFrame中的像素信息编码为AVPacket中的码流
    if (ret < 0)
    {
        fprintf(stderr, "Error encoding frame\n");
        exit(1);
    }

    if (got_output)
    {
        //获得一个完整的编码帧
        printf("Write frame %3d (size=%5d)\n", frameIdx, ctx.pkt.size);
        fwrite(ctx.pkt.data, 1, ctx.pkt.size, io_param.pFout);
        av_packet_unref(&(ctx.pkt));
    }
} //for (frameIdx = 0; frameIdx < io_param.nTotalFrames; frameIdx++)
(4)、收尾处理
如果我们就此结束编码器的整个运行过程,我们会发现,编码完成之后的码流对比原来的数据少了一帧。这是因为我们是根据读取原始像素数据结束来判断循环结束的,这样最后一帧还保留在编码器中尚未输出。所以在关闭整个解码过程之前,我们必须继续执行编码的操作,直到将最后一帧输出为止。执行这项操作依然调用avcodec_encode_video2函数,只是表示AVFrame的参数设为NULL即可:
/* get the delayed frames */
for (got_output = 1; got_output; frameIdx++)
{
    fflush(stdout);

    ret = avcodec_encode_video2(ctx.c, &(ctx.pkt), NULL, &got_output);        //输出编码器中剩余的码流
    if (ret < 0)
    {
        fprintf(stderr, "Error encoding frame\n");
        exit(1);
    }

    if (got_output)
    {
        printf("Write frame %3d (size=%5d)\n", frameIdx, ctx.pkt.size);
        fwrite(ctx.pkt.data, 1, ctx.pkt.size, io_param.pFout);
        av_packet_unref(&(ctx.pkt));
    }
} //for (got_output = 1; got_output; frameIdx++)
此后,我们就可以按计划关闭编码器的各个组件,结束整个编码的流程。编码器组件的释放流程可类比建立流程,需要关闭AVCocec、释放AVCodecContext、释放AVFrame中的图像缓存和对象本身:
avcodec_close(ctx.c);
av_free(ctx.c);
av_freep(&(ctx.frame->data[0]));
av_frame_free(&(ctx.frame));
3、总结
使用FFMpeg进行视频编码的主要流程如:
- 首先解析、处理输入参数,如编码器的参数、图像的参数、输入输出文件;
- 建立整个FFMpeg编码器的各种组件工具,顺序依次为:avcodec_register_all -> avcodec_find_encoder -> avcodec_alloc_context3 -> avcodec_open2 -> av_frame_alloc -> av_image_alloc;
- 编码循环:av_init_packet -> avcodec_encode_video2(两次) -> av_packet_unref
- 关闭编码器组件:avcodec_close,av_free,av_freep,av_frame_free
三、调用FFmpeg SDK对H.264格式的视频压缩码流进行解码
经过了上篇调用FFMpeg SDK对视频进行编码的过程之后,我们可以比较容易地理解本篇的内容,即上一篇的逆过程——将H.264格式的裸码流解码为像素格式的图像信息。
1、FFMpeg视频解码器所包含的结构
同FFMpeg编码器类似,FFMpeg解码器也需要编码时的各种结构,除此之外,解码器还需要另一个结构——编解码解析器——用于从码流中截取出一帧完整的码流数据单元。因此我们定义一个编解码上下文结构为:
/*************************************************
Struct:            CodecCtx
Description:    FFMpeg编解码器上下文
*************************************************/
typedef struct
{
    AVCodec            *pCodec;                //编解码器实例指针
    AVCodecContext    *pCodecContext;            //编解码器上下文,指定了编解码的参数
    AVCodecParserContext *pCodecParserCtx;    //编解码解析器,从码流中截取完整的一个NAL Unit数据

    AVFrame            *frame;                    //封装图像对象指针
    AVPacket        pkt;                    //封装码流对象实例
} CodecCtx;
2、FFMpeg进行解码操作的主要步骤
(1). 参数传递和解析
同编码器类似,解码器也需要传递参数。不过相比编码器,解码器在运行时所需要的大部分信息都包含在输入码流中,因此输入参数一般只需要指定一个待解码的视频码流文件即可
(2). 按照要求初始化需要的FFMpeg结构
首先,所有涉及到编解码的的功能,都必须要注册音视频编解码器之后才能使用。注册编解码调用下面的函数:
avcodec_register_all();
编解码器注册完成之后,根据指定的CODEC_ID查找指定的codec实例。CODEC_ID通常指定了编解码器的格式,在这里我们使用当前应用最为广泛的H.264格式为例。查找codec调用的函数为avcodec_find_encoder,其声明格式为:
AVCodec *avcodec_find_encoder(enum AVCodecID id);
该函数的输入参数为一个AVCodecID的枚举类型,返回值为一个指向AVCodec结构的指针,用于接收找到的编解码器实例。如果没有找到,那么该函数会返回一个空指针。调用方法如下:
/* find the mpeg1 video encoder */
ctx.codec = avcodec_find_encoder(AV_CODEC_ID_H264);    //根据CODEC_ID查找编解码器对象实例的指针
if (!ctx.codec)
{
    fprintf(stderr, "Codec not found\n");
    return false;
}
AVCodec查找成功后,下一步是分配AVCodecContext实例。分配AVCodecContext实例需要我们前面查找到的AVCodec作为参数,调用的是avcodec_alloc_context3函数。其声明方式为:
AVCodecContext *avcodec_alloc_context3(const AVCodec *codec);
其特点同avcodec_find_encoder类似,返回一个指向AVCodecContext实例的指针。如果分配失败,会返回一个空指针。调用方式为:
ctx.c = avcodec_alloc_context3(ctx.codec);            //分配AVCodecContext实例
if (!ctx.c)
{
    fprintf(stderr, "Could not allocate video codec context\n");
    return false;
}
我们应该记得,在FFMpeg视频编码的实现中,AVCodecContext对象分配完成后,下一步实在该对象中设置编码的参数。而在解码器的实现中,基本不需要额外设置参数信息,因此这个对象更多地作为输出参数接收数据。因此对象分配完成后,不需要进一步的初始化操作。
解码器与编码器实现中不同的一点在于,解码器的实现中需要额外的一个AVCodecParserContext结构,用于从码流中截取一个完整的NAL单元。因此我们需要分配一个AVCodecParserContext类型的对象,使用函数av_parser_init,声明为:
AVCodecParserContext *av_parser_init(int codec_id);
调用方式为:
ctx.pCodecParserCtx = av_parser_init(AV_CODEC_ID_H264);
if (!ctx.pCodecParserCtx)
{
    printf("Could not allocate video parser context\n");
    return false;
}
随后,打开AVCodec对象,然后分配AVFrame对象:
//打开AVCodec对象
if (avcodec_open2(ctx.pCodecContext, ctx.pCodec, NULL) < 0)
{
    fprintf(stderr, "Could not open codec\n");
    return false;
}

//分配AVFrame对象
ctx.frame = av_frame_alloc();
if (!ctx.frame)
{
    fprintf(stderr, "Could not allocate video frame\n");
    return false;
}
(3)、解码循环体
完成必须的codec组件的建立和初始化之后,开始进入正式的解码循环过程。解码循环通常按照以下几个步骤实现:
首先按照某个指定的长度读取一段码流保存到缓存区中。
由于H.264中一个包的长度是不定的,我们读取一段固定长度的码流通常不可能刚好读出一个包的长度。所以我们就需要使用AVCodecParserContext结构对我们读出的码流信息进行解析,直到取出一个完整的H.264包。对码流解析的函数为av_parser_parse2,声明方式如:
int av_parser_parse2(AVCodecParserContext *s,
                 AVCodecContext *avctx,
                 uint8_t **poutbuf, int *poutbuf_size,
                 const uint8_t *buf, int buf_size,
                 int64_t pts, int64_t dts,
                 int64_t pos);
这个函数的各个参数的意义:
- AVCodecParserContext *s:初始化过的AVCodecParserContext对象,决定了码流该以怎样的标准进行解析;
- *AVCodecContext avctx:预先定义好的AVCodecContext对象;
- uint8_t **poutbuf:AVPacket::data的地址,保存解析完成的包数据;
- int *poutbuf_size:AVPacket的实际数据长度;如果没解析出完整的一个包,这个值为0;
- const uint8_t *buf, int buf_size:输入参数,缓存的地址和长度;
- int64_t pts, int64_t dts:显示和解码的时间戳;
- nt64_t pos :码流中的位置;
- 返回值为解析所使用的比特位的长度;
具体的调用方式为:
len = av_parser_parse2(ctx.pCodecParserCtx, ctx.pCodecContext,
                        &(ctx.pkt.data), &(ctx.pkt.size),
                        pDataPtr, uDataSize,
                        AV_NOPTS_VALUE, AV_NOPTS_VALUE, AV_NOPTS_VALUE);
如果参数poutbuf_size的值为0,那么应继续解析缓存中剩余的码流;如果缓存中的数据全部解析后依然未能找到一个完整的包,那么继续从输入文件中读取数据到缓存,继续解析操作,直到pkt.size不为0为止。
在最终解析出一个完整的包之后,我们就可以调用解码API进行实际的解码过程了。解码过程调用的函数为avcodec_decode_video2,该函数的声明为:
int avcodec_decode_video2(AVCodecContext *avctx, AVFrame *picture,
                     int *got_picture_ptr,
                     const AVPacket *avpkt);
这个函数与前篇所遇到的编码函数avcodec_encode_video2有些类似,只是参数的顺序略有不同,解码函数的输入输出参数与编码函数相比交换了位置。该函数各个参数的意义:
- AVCodecContext *avctx:编解码器上下文对象,在打开编解码器时生成;
- AVFrame *picture: 保存解码完成后的像素数据;我们只需要分配对象的空间,像素的空间codec会为我们分配好;
- int *got_picture_ptr: 标识位,如果为1,那么说明已经有一帧完整的像素帧可以输出了
- const AVPacket *avpkt: 前面解析好的码流包;
实际调用的方法为:
int ret = avcodec_decode_video2(ctx.pCodecContext, ctx.frame, &got_picture, &(ctx.pkt));
if (ret < 0)
{
    printf("Decode Error.\n");
    return ret;
}

if (got_picture)
{
    //获得一帧完整的图像,写出到输出文件
    write_out_yuv_frame(ctx, inputoutput);
    printf("Succeed to decode 1 frame!\n");
}
最后,同编码器一样,解码过程的最后一帧可能也存在延迟。处理最后这一帧的方法也跟解码器类似:将AVPacket::data设为NULL,AVPacket::size设为0,然后在调用avcodec_encode_video2完成最后的解码过程:
ctx.pkt.data = NULL;
ctx.pkt.size = 0;
while(1)
{
    //将编码器中剩余的数据继续输出完
    int ret = avcodec_decode_video2(ctx.pCodecContext, ctx.frame, &got_picture, &(ctx.pkt));
    if (ret < 0)
    {
        printf("Decode Error.\n");
        return ret;
    }

    if (got_picture)
    {
        write_out_yuv_frame(ctx, inputoutput);
        printf("Flush Decoder: Succeed to decode 1 frame!\n");
    }
    else
    {
        break;
    }
} //while(1)
####(4). 收尾工作
收尾工作主要包括关闭输入输出文件、关闭FFMpeg解码器各个组件。其中关闭解码器组件需要:
avcodec_close(ctx.pCodecContext);
av_free(ctx.pCodecContext);
av_frame_free(&(ctx.frame));
3、总结
解码器的流程与编码器类似,只是中间需要加入一个解析的过程。整个流程大致为:
1.读取码流数据 -> 2.解析数据,是否尚未解析出一个包就已经用完?是返回1,否继续 -> 3.解析出一个包?是则继续,否则返回上一步继续解析 -> 4.调用avcodec_decode_video2进行解码 -> 5.是否解码出一帧完整的图像?是则继续,否则返回上一步继续解码 -> 6.写出图像数据 -> 返回步骤2继续解析。
四、调用FFmpeg SDK解析封装格式的视频为音频流和视频流
我们平常最常用的音视频文件通常不是单独的音频信号和视频信号,而是一个整体的文件。这个文件会在其中包含音频流和视频流,并通过某种方式进行同步播放。通常,文件的音频和视频通过某种标准格式进行复用,生成某种封装格式,而封装的标志就是文件的扩展名,常用的有mp4/avi/flv/mkv等。
从底层考虑,我们可以使用的只有视频解码器、音频解码器,或者再加上一些附加的字幕解码等额外信息,却不存在所谓的mp4解码器或者avi解码器。所以,为了可以正确播放视频文件,必须将封装格式的视频文件分离出视频和音频信息分别进行解码和播放。
事实上,无论是mp4还是avi等文件格式,都有不同的标准格式,对于不同的格式并没有一种通用的解析方法。因此,FFMpeg专门定义了一个库来处理设计文件封装格式的功能,即libavformat。涉及文件的封装、解封装的问题,都可以通过调用libavformat的API实现。这里我们实现一个demo来处理音视频文件的解复用与解码的功能。
1. FFMpeg解复用-解码器所包含的结构
这一过程实际上包括了封装文件的解复用和音频/视频解码两个步骤,因此需要定义的结构体大致包括用于解码和解封装的部分。我们定义下面这样的一个结构体实现这个功能:
/*************************************************
Struct:            DemuxingVideoAudioContex
Description:    保存解复用器和解码器的上下文组件
*************************************************/
typedef struct
{
    AVFormatContext *fmt_ctx;
    AVCodecContext *video_dec_ctx, *audio_dec_ctx;
    AVStream *video_stream, *audio_stream;
    AVFrame *frame;
    AVPacket pkt;

    int video_stream_idx, audio_stream_idx;
    int width, height;

    uint8_t *video_dst_data[4];
    int video_dst_linesize[4];
    int video_dst_bufsize;
    enum AVPixelFormat pix_fmt;
} DemuxingVideoAudioContex;
这个结构体中的大部分数据类型我们在前面做编码/解码等功能时已经见到过,另外几个是涉及到视频文件的复用的,其中有:
- AVFormatContext:用于处理音视频封装格式的上下文信息。
- AVStream:表示音频或者视频流的结构。
- AVPixelFormat:枚举类型,表示图像像素的格式,最常用的是AV_PIX_FMT_YUV420P
2、FFMpeg解复用-解码的过程
(1)、相关结构的初始化
与使用FFMpeg进行其他操作一样,首先需注册FFMpeg组件:
av_register_all();
随后,我们需要打开待处理的音视频文件。然而在此我们不使用打开文件的fopen函数,而是使用avformat_open_input函数。该函数不但会打开输入文件,而且可以根据输入文件读取相应的格式信息。该函数的声明如下:
int avformat_open_input(AVFormatContext **ps, const char *url, AVInputFormat *fmt, AVDictionary **options);
该函数的各个参数的作用为:
- ps:根据输入文件接收与格式相关的句柄信息;可以指向NULL,那么AVFormatContext类型的实例将由该函数进行分配。
- url:视频url或者文件路径;
- fmt:强制输入格式,可设置为NULL以自动检测;
- options:保存文件格式无法识别的信息;
- 返回值:成功返回0,失败则返回负的错误码;
该函数的调用方式为:
if (avformat_open_input(&(va_ctx.fmt_ctx), files.src_filename, NULL, NULL) < 0)
{
    fprintf(stderr, "Could not open source file %s\n", files.src_filename);
    return -1;
}
打开文件后,调用avformat_find_stream_info函数获取文件中的流信息。该函数的声明为:
int avformat_find_stream_info(AVFormatContext *ic, AVDictionary **options);
该函数的第一个参数即前面的文件句柄,第二个参数也是用于保存无法识别的信息的AVDictionary的结构,通常可设为NULL。调用方式如:
/* retrieve stream information */
if (avformat_find_stream_info(va_ctx.fmt_ctx, NULL) < 0)
{
    fprintf(stderr, "Could not find stream information\n");
    return -1;
}
获取文件中的流信息后,下一步则是获取文件中的音频和视频流,并准备对音频和视频信息进行解码。获取文件中的流使用av_find_best_stream函数,其声明如:
int av_find_best_stream(AVFormatContext *ic,
                    enum AVMediaType type,
                    int wanted_stream_nb,
                    int related_stream,
                    AVCodec **decoder_ret,
                    int flags);
其中各个参数的意义:
- ic:视频文件句柄;
- type:表示数据的类型,常用的有AVMEDIA_TYPE_VIDEO表示视频,AVMEDIA_TYPE_AUDIO表示音频等;
- wanted_stream_nb:我们期望获取到的数据流的数量,设置为-1使用自动获取;
- related_stream:获取相关的音视频流,如果没有则设为-1;
- decoder_ret:返回这一路数据流的解码器;
- flags:未定义;
- 返回值:函数执行成功返回流的数量,失败则返回负的错误码;
在函数执行成功后,便可调用avcodec_find_decoder和avcodec_open2打开解码器准备解码音视频流。该部分的代码实现如:
static int open_codec_context(IOFileName &files, DemuxingVideoAudioContex &va_ctx, enum AVMediaType type)
{
    int ret, stream_index;
    AVStream *st;
    AVCodecContext *dec_ctx = NULL;
    AVCodec *dec = NULL;
    AVDictionary *opts = NULL;

    ret = av_find_best_stream(va_ctx.fmt_ctx, type, -1, -1, NULL, 0);
    if (ret < 0)
    {
        fprintf(stderr, "Could not find %s stream in input file '%s'\n", av_get_media_type_string(type), files.src_filename);
        return ret;
    }
    else
    {
        stream_index = ret;
        st = va_ctx.fmt_ctx->streams[stream_index];

        /* find decoder for the stream */
        dec_ctx = st->codec;
        dec = avcodec_find_decoder(dec_ctx->codec_id);
        if (!dec)
        {
            fprintf(stderr, "Failed to find %s codec\n", av_get_media_type_string(type));
            return AVERROR(EINVAL);
        }

        /* Init the decoders, with or without reference counting */
        av_dict_set(&opts, "refcounted_frames", files.refcount ? "1" : "0", 0);
        if ((ret = avcodec_open2(dec_ctx, dec, &opts)) < 0)
        {
            fprintf(stderr, "Failed to open %s codec\n", av_get_media_type_string(type));
            return ret;
        }

        switch (type)
        {
        case AVMEDIA_TYPE_VIDEO:
            va_ctx.video_stream_idx = stream_index;
            va_ctx.video_stream = va_ctx.fmt_ctx->streams[stream_index];
            va_ctx.video_dec_ctx = va_ctx.video_stream->codec;
            break;
        case AVMEDIA_TYPE_AUDIO:
            va_ctx.audio_stream_idx = stream_index;
            va_ctx.audio_stream = va_ctx.fmt_ctx->streams[stream_index];
            va_ctx.audio_dec_ctx = va_ctx.audio_stream->codec;
            break;
        default:
            fprintf(stderr, "Error: unsupported MediaType: %s\n", av_get_media_type_string(type));
            return -1;
        }
    }

    return 0;
}
整体初始化的函数代码为:
int InitDemuxContext(IOFileName &files, DemuxingVideoAudioContex &va_ctx)
{
    int ret = 0, width, height;

    /* register all formats and codecs */
    av_register_all();

    /* open input file, and allocate format context */
    if (avformat_open_input(&(va_ctx.fmt_ctx), files.src_filename, NULL, NULL) < 0)
    {
        fprintf(stderr, "Could not open source file %s\n", files.src_filename);
        return -1;
    }

    /* retrieve stream information */
    if (avformat_find_stream_info(va_ctx.fmt_ctx, NULL) < 0)
    {
        fprintf(stderr, "Could not find stream information\n");
        return -1;
    }

    if (open_codec_context(files, va_ctx, AVMEDIA_TYPE_VIDEO) >= 0)
    {
        files.video_dst_file = fopen(files.video_dst_filename, "wb");
        if (!files.video_dst_file)
        {
            fprintf(stderr, "Could not open destination file %s\n", files.video_dst_filename);
            return -1;
        }

        /* allocate image where the decoded image will be put */
        va_ctx.width = va_ctx.video_dec_ctx->width;
        va_ctx.height = va_ctx.video_dec_ctx->height;
        va_ctx.pix_fmt = va_ctx.video_dec_ctx->pix_fmt;
        ret = av_image_alloc(va_ctx.video_dst_data, va_ctx.video_dst_linesize, va_ctx.width, va_ctx.height, va_ctx.pix_fmt, 1);
        if (ret < 0)
        {
            fprintf(stderr, "Could not allocate raw video buffer\n");
            return -1;
        }
        va_ctx.video_dst_bufsize = ret;
    }

    if (open_codec_context(files, va_ctx, AVMEDIA_TYPE_AUDIO) >= 0)
    {
        files.audio_dst_file = fopen(files.audio_dst_filename, "wb");
        if (!files.audio_dst_file)
        {
            fprintf(stderr, "Could not open destination file %s\n", files.audio_dst_filename);
            return -1;
        }
    }

    if (va_ctx.video_stream)
    {
        printf("Demuxing video from file '%s' into '%s'\n", files.src_filename, files.video_dst_filename);
    }

    if (va_ctx.audio_stream)
    {
        printf("Demuxing audio from file '%s' into '%s'\n", files.src_filename, files.audio_dst_filename);
    }

    /* dump input information to stderr */
    av_dump_format(va_ctx.fmt_ctx, 0, files.src_filename, 0);

    if (!va_ctx.audio_stream && !va_ctx.video_stream)
    {
        fprintf(stderr, "Could not find audio or video stream in the input, aborting\n");
        return -1;
    }

    return 0;
}
随后要做的,是分配AVFrame和初始化AVPacket对象:
va_ctx.frame = av_frame_alloc();            //分配AVFrame结构对象
if (!va_ctx.frame)
{
    fprintf(stderr, "Could not allocate frame\n");
    ret = AVERROR(ENOMEM);
    goto end;
}

/* initialize packet, set data to NULL, let the demuxer fill it */
av_init_packet(&va_ctx.pkt);                //初始化AVPacket对象
va_ctx.pkt.data = NULL;
va_ctx.pkt.size = 0;
(2)、循环解析视频文件的包数据
解析视频文件的循环代码段为:
/* read frames from the file */
while (av_read_frame(va_ctx.fmt_ctx, &va_ctx.pkt) >= 0)        //从输入程序中读取一个包的数据
{
    AVPacket orig_pkt = va_ctx.pkt;
    do
    {
        ret = Decode_packet(files, va_ctx, &got_frame, 0);    //解码这个包
        if (ret < 0)
            break;
        va_ctx.pkt.data += ret;
        va_ctx.pkt.size -= ret;
    } while (va_ctx.pkt.size > 0);
    av_packet_unref(&orig_pkt);
}
这部分代码逻辑上非常简单,首先调用av_read_frame函数,从文件中读取一个packet的数据,并实现了一个Decode_packet对这个packet进行解码。Decode_packet函数的实现如下:
int Decode_packet(IOFileName &files, DemuxingVideoAudioContex &va_ctx, int *got_frame, int cached)
{
    int ret = 0;
    int decoded = va_ctx.pkt.size;
    static int video_frame_count = 0;
    static int audio_frame_count = 0;

    *got_frame = 0;

    if (va_ctx.pkt.stream_index == va_ctx.video_stream_idx)
    {
        /* decode video frame */
        ret = avcodec_decode_video2(va_ctx.video_dec_ctx, va_ctx.frame, got_frame, &va_ctx.pkt);
        if (ret < 0)
        {
            printf("Error decoding video frame (%d)\n", ret);
            return ret;
        }

        if (*got_frame)
        {
            if (va_ctx.frame->width != va_ctx.width || va_ctx.frame->height != va_ctx.height ||
                va_ctx.frame->format != va_ctx.pix_fmt)
            {
                /* To handle this change, one could call av_image_alloc again and
                * decode the following frames into another rawvideo file. */
                printf("Error: Width, height and pixel format have to be "
                    "constant in a rawvideo file, but the width, height or "
                    "pixel format of the input video changed:\n"
                    "old: width = %d, height = %d, format = %s\n"
                    "new: width = %d, height = %d, format = %s\n",
                    va_ctx.width, va_ctx.height, av_get_pix_fmt_name((AVPixelFormat)(va_ctx.pix_fmt)),
                    va_ctx.frame->width, va_ctx.frame->height,
                    av_get_pix_fmt_name((AVPixelFormat)va_ctx.frame->format));
                return -1;
            }

            printf("video_frame%s n:%d coded_n:%d pts:%s\n", cached ? "(cached)" : "", video_frame_count++, va_ctx.frame->coded_picture_number, va_ctx.frame->pts);

            /* copy decoded frame to destination buffer:
            * this is required since rawvideo expects non aligned data */
            av_image_copy(va_ctx.video_dst_data, va_ctx.video_dst_linesize,
                (const uint8_t **)(va_ctx.frame->data), va_ctx.frame->linesize,
                va_ctx.pix_fmt, va_ctx.width, va_ctx.height);

            /* write to rawvideo file */
            fwrite(va_ctx.video_dst_data[0], 1, va_ctx.video_dst_bufsize, files.video_dst_file);
        }
    }
    else if (va_ctx.pkt.stream_index == va_ctx.audio_stream_idx)
    {
        /* decode audio frame */
        ret = avcodec_decode_audio4(va_ctx.audio_dec_ctx, va_ctx.frame, got_frame, &va_ctx.pkt);
        if (ret < 0)
        {
            printf("Error decoding audio frame (%s)\n", ret);
            return ret;
        }
        /* Some audio decoders decode only part of the packet, and have to be
        * called again with the remainder of the packet data.
        * Sample: fate-suite/lossless-audio/luckynight-partial.shn
        * Also, some decoders might over-read the packet. */
        decoded = FFMIN(ret, va_ctx.pkt.size);

        if (*got_frame)
        {
            size_t unpadded_linesize = va_ctx.frame->nb_samples * av_get_bytes_per_sample((AVSampleFormat)va_ctx.frame->format);
            printf("audio_frame%s n:%d nb_samples:%d pts:%s\n",
                cached ? "(cached)" : "",
                audio_frame_count++, va_ctx.frame->nb_samples,
                va_ctx.frame->pts);

            /* Write the raw audio data samples of the first plane. This works
            * fine for packed formats (e.g. AV_SAMPLE_FMT_S16). However,
            * most audio decoders output planar audio, which uses a separate
            * plane of audio samples for each channel (e.g. AV_SAMPLE_FMT_S16P).
            * In other words, this code will write only the first audio channel
            * in these cases.
            * You should use libswresample or libavfilter to convert the frame
            * to packed data. */
            fwrite(va_ctx.frame->extended_data[0], 1, unpadded_linesize, files.audio_dst_file);
        }
    }

        /* If we use frame reference counting, we own the data and need
        * to de-reference it when we don't use it anymore */
        if (*got_frame && files.refcount)
            av_frame_unref(va_ctx.frame);

        return decoded;
}
在该函数中,首先对读取到的packet中的stream_index分别于先前获取的音频和视频的stream_index进行对比来确定是音频还是视频流。而后分别调用相应的解码函数进行解码,以视频流为例,判断当前stream为视频流后,调用avcodec_decode_video2函数将流数据解码为像素数据,并在获取完整的一帧之后,将其写出到输出文件中。
3、总结
相对于前文讲述过的解码H.264格式裸码流,解封装+解码过程看似多了一个步骤,然而在实现起来实际上并无过多差别。这主要是由于FFMpeg中的多个API已经很好地实现了封装文件的解析和读取过程,如打开文件我们使用avformat_open_input代替fopen,读取数据包使用av_read_frame代替fread,其他方面只需要多一步判断封装文件中数据流的类型即可,剩余部分与裸码流的解码并无太多差别。
##五、调用FFMpeg SDK封装音频和视频为视频文件
音频和视频的封装过程为解封装的逆过程,即将独立的音频数据和视频数据按照容器文件所规定的格式封装为一个完整的视频文件的过程。对于大多数消费者来说,视频封装的容器是大家最为熟悉的,因为它直接体现在了我们使用的音视频文件扩展名上,比较常见的有mp4、avi、mkv、flv等等。
在进行音频和视频封装时,我们将实际操作一系列音频或视频流数据的生成和写入。所谓流,指的是一系列相关联的包的集合,这些包一般同属于一组按照时间先后顺序进行解码/渲染等处理的数据。在一个比较典型的视频文件中,我们通常至少会包含一个视频流和一个音频流。
在FFMpeg中,表示音频流或视频流有一个专门的结构,即”AVStream”实现。该结构主要对音频和视频数据的处理进行管理和控制。另外,”AVFormatContext”结构也是必须的,因为它包含了控制输入和输出的信息。
音频和视频数据封装为视频文件的主要步骤为:
1. 相关数据结构的准备
首先,根据输出文件的格式获取AVFormatContext结构,获取AVFormatContext结构使用函数avformat_alloc_output_context2实现。该函数的声明为:
int avformat_alloc_output_context2(AVFormatContext **ctx, AVOutputFormat *oformat, const char *format_name, const char *filename);
其中:
- ctx:输出到AVFormatContext结构的指针,如果函数失败则返回给该指针为NULL;
- oformat:指定输出的AVOutputFormat类型,如果设为NULL则使用format_name和filename生成;
- format_name:输出格式的名称,如果设为NULL则使用filename默认格式;
- filename:目标文件名,如果不使用,可以设为NULL;
分配AVFormatContext成功后,我们需要添加希望封装的数据流,一般是一路视频流+一路音频流(可能还有其他音频流和字幕流等)。添加流首先需要查找流所包含的媒体的编码器,这需要传入codec_id后使用avcodec_find_encoder函数实现,将查找到的编码器保存在AVCodec指针中。
之后,调用avformat_new_stream函数向AVFormatContext结构中所代表的媒体文件中添加数据流。该函数的声明如下:
AVStream *avformat_new_stream(AVFormatContext *s, const AVCodec *c);
其中各个参数的含义:
- s:AVFormatContext结构,表示要封装生成的视频文件;
- c:上一步根据codec_id产生的编码器指针;
- 返回值:指向生成的stream对象的指针;如果失败则返回NULL指针。
此时,一个新的AVStream便已经加入到输出文件中,下面就可以设置stream的id和codec等参数。AVStream::codec是一个AVCodecContext类型的指针变量成员,设置其中的值可以对编码进行配置。整个添加stream的例子如:
/* Add an output stream. */
static void add_stream(OutputStream *ost, AVFormatContext *oc,    AVCodec **codec, enum AVCodecID codec_id)
{
    AVCodecContext *c;
    int i;

    /* find the encoder */
    *codec = avcodec_find_encoder(codec_id);
    if (!(*codec))
    {
        fprintf(stderr, "Could not find encoder for '%s'\n", avcodec_get_name(codec_id));
        exit(1);
    }

    ost->st = avformat_new_stream(oc, *codec);
    if (!ost->st)
    {
        fprintf(stderr, "Could not allocate stream\n");
        exit(1);
    }
    ost->st->id = oc->nb_streams - 1;
    c = ost->st->codec;

    switch ((*codec)->type)
    {
    case AVMEDIA_TYPE_AUDIO:
        c->sample_fmt = (*codec)->sample_fmts ? (*codec)->sample_fmts[0] : AV_SAMPLE_FMT_FLTP;
        c->bit_rate = 64000;
        c->sample_rate = 44100;

        if ((*codec)->supported_samplerates)
        {
            c->sample_rate = (*codec)->supported_samplerates[0];
            for (i = 0; (*codec)->supported_samplerates[i]; i++)
            {
                if ((*codec)->supported_samplerates[i] == 44100)
                    c->sample_rate = 44100;
            }
        }

        c->channels = av_get_channel_layout_nb_channels(c->channel_layout);
        c->channel_layout = AV_CH_LAYOUT_STEREO;
        if ((*codec)->channel_layouts)
        {
            c->channel_layout = (*codec)->channel_layouts[0];
            for (i = 0; (*codec)->channel_layouts[i]; i++)
            {
                if ((*codec)->channel_layouts[i] == AV_CH_LAYOUT_STEREO)
                    c->channel_layout = AV_CH_LAYOUT_STEREO;
            }
        }
        c->channels = av_get_channel_layout_nb_channels(c->channel_layout);
        {
            AVRational r = { 1, c->sample_rate };
            ost->st->time_base = r;
        }
        break;

    case AVMEDIA_TYPE_VIDEO:
        c->codec_id = codec_id;

        c->bit_rate = 400000;
        /* Resolution must be a multiple of two. */
        c->width = 352;
        c->height = 288;
        /* timebase: This is the fundamental unit of time (in seconds) in terms
        * of which frame timestamps are represented. For fixed-fps content,
        * timebase should be 1/framerate and timestamp increments should be
        * identical to 1. */
        {
            AVRational r = { 1, STREAM_FRAME_RATE };
            ost->st->time_base = r;
        }
        c->time_base = ost->st->time_base;

        c->gop_size = 12; /* emit one intra frame every twelve frames at most */
        c->pix_fmt = AV_PIX_FMT_YUV420P;
        if (c->codec_id == AV_CODEC_ID_MPEG2VIDEO)
        {
            /* just for testing, we also add B frames */
            c->max_b_frames = 2;
        }
        if (c->codec_id == AV_CODEC_ID_MPEG1VIDEO)
        {
            /* Needed to avoid using macroblocks in which some coeffs overflow.
            * This does not happen with normal video, it just happens here as
            * the motion of the chroma plane does not match the luma plane. */
            c->mb_decision = 2;
        }
        break;

    default:
        break;
    }

    /* Some formats want stream headers to be separate. */
    if (oc->oformat->flags & AVFMT_GLOBALHEADER)
        c->flags |= AV_CODEC_FLAG_GLOBAL_HEADER;
}
2. 打开音视频
打开音视频主要涉及到打开编码音视频数据所需要的编码器,以及分配相应的frame对象。其中打开编码器如之前一样,调用avcodec_open函数,分配frame对象调用av_frame_alloc以及av_frame_get_buffer。分配frame对象的实现如下:
static AVFrame *alloc_picture(enum AVPixelFormat pix_fmt, int width, int height)
{
    AVFrame *picture;
    int ret;

    picture = av_frame_alloc();
    if (!picture)
    {
        return NULL;
    }

    picture->format = pix_fmt;
    picture->width = width;
    picture->height = height;

    /* allocate the buffers for the frame data */
    ret = av_frame_get_buffer(picture, 32);
    if (ret < 0)
    {
        fprintf(stderr, "Could not allocate frame data.\n");
        exit(1);
    }

    return picture;
}
而上层打开音视频部分的实现如:
void Open_video(AVFormatContext *oc, AVCodec *codec, OutputStream *ost, AVDictionary *opt_arg, IOParam &io)
{
    int ret;
    AVCodecContext *c = ost->st->codec;
    AVDictionary *opt = NULL;

    av_dict_copy(&opt, opt_arg, 0);

    /* open the codec */
    ret = avcodec_open2(c, codec, &opt);
    av_dict_free(&opt);
    if (ret < 0)
    {
        fprintf(stderr, "Could not open video codec: %d\n", ret);
        exit(1);
    }

    /* allocate and init a re-usable frame */
    ost->frame = alloc_picture(c->pix_fmt, c->width, c->height);
    if (!ost->frame)
    {
        fprintf(stderr, "Could not allocate video frame\n");
        exit(1);
    }

    /* If the output format is not YUV420P, then a temporary YUV420P
    * picture is needed too. It is then converted to the required
    * output format. */
    ost->tmp_frame = NULL;
    if (c->pix_fmt != AV_PIX_FMT_YUV420P)
    {
        ost->tmp_frame = alloc_picture(AV_PIX_FMT_YUV420P, c->width, c->height);
        if (!ost->tmp_frame)
        {
            fprintf(stderr, "Could not allocate temporary picture\n");
            exit(1);
        }
    }

    //打开输入YUV文件
    fopen_s(&g_inputYUVFile, io.input_file_name, "rb+");
    if (g_inputYUVFile == NULL)
    {
        fprintf(stderr, "Open input yuv file failed.\n");
        exit(1);
    }
}
3. 打开输出文件并写入文件头
如果判断需要写出文件的话,则需要打开输出文件。在这里,我们可以不再定义输出文件指针,并使用fopen打开,而是直接使用FFMpeg的API——avio_open来实现输出文件的打开功能。该函数的声明如下:
int avio_open(AVIOContext **s, const char *url, int flags);
该函数的输入参数为:
- s:输出参数,返回一个AVIOContext;如果打开失败则返回NULL;
- url:输出的url或者文件的完整路径;
- flags:控制文件打开方式,如读方式、写方式和读写方式;
实际的代码实现方式如下:
/* open the output file, if needed */
if (!(fmt->flags & AVFMT_NOFILE))
{
    ret = avio_open(&oc->pb, io.output_file_name, AVIO_FLAG_WRITE);
    if (ret < 0)
    {
        fprintf(stderr, "Could not open '%s': %d\n", io.output_file_name, ret);
        return 1;
    }
}
写入文件头操作是生成视频文件中极为重要的一步,而实现过程却非常简单,只需要通过函数avformat_write_header即可,该函数的声明为:
int avformat_write_header(AVFormatContext *s, AVDictionary **options);
其输入参数实际上重要的只有第一个,即标记输出文件的句柄对象指针;options用于保存无法识别的设置项,可以传入一个空指针。其返回值表示写文件头成功与否,成功则返回0,失败则返回负的错误码。
实现方式如:
/* Write the stream header, if any. */
ret = avformat_write_header(oc, &opt);
if (ret < 0)
{
    fprintf(stderr, "Error occurred when opening output file: %d\n",ret);
    return 1;
}
###4. 编码和封装循环
以视频流为例。编解码循环的过程实际上可以封装在一个函数Write_video_frame中。该函数从逻辑上可以分为3个部分:获取原始视频信号、视频编码、写入输出文件。
(1) 读取原始视频数据
这一部分主要实现根据时长判断是否需要继续进行处理、读取视频到AVFrame和设置pts。其中时长判断部分根据pts和AVCodecContext的time_base判断。实现如下:
AVCodecContext *c = ost->st->codec;

/* check if we want to generate more frames */
{
    AVRational r = { 1, 1 };
    if (av_compare_ts(ost->next_pts, ost->st->codec->time_base, STREAM_DURATION, r) >= 0)
    {
        return NULL;
    }
}
读取视频到AVFrame我们定义一个fill_yuv_image函数实现:
static void fill_yuv_image(AVFrame *pict, int frame_index, int width, int height)
{
    int x, y, i, ret;

    /* when we pass a frame to the encoder, it may keep a reference to it
    * internally;
    * make sure we do not overwrite it here
    */
    ret = av_frame_make_writable(pict);
    if (ret < 0)
    {
        exit(1);
    }

    i = frame_index;

    /* Y */
    for (y = 0; y < height; y++)
    {
        ret = fread_s(&pict->data[0][y * pict->linesize[0]], pict->linesize[0], 1, width, g_inputYUVFile);
        if (ret != width)
        {
            printf("Error: Read Y data error.\n");
            exit(1);
        }
    }

    /* U */
    for (y = 0; y < height / 2; y++)
    {
        ret = fread_s(&pict->data[1][y * pict->linesize[1]], pict->linesize[1], 1, width / 2, g_inputYUVFile);
        if (ret != width / 2)
        {
            printf("Error: Read U data error.\n");
            exit(1);
        }
    }

    /* V */
    for (y = 0; y < height / 2; y++)
    {
        ret = fread_s(&pict->data[2][y * pict->linesize[2]], pict->linesize[2], 1, width / 2, g_inputYUVFile);
        if (ret != width / 2)
        {
            printf("Error: Read V data error.\n");
            exit(1);
        }
    }
}
然后进行pts的设置,很简单,就是上一个frame的pts递增1:
ost->frame->pts = ost->next_pts++;
整个获取视频信号的实现如:
static AVFrame *get_video_frame(OutputStream *ost)
{
    AVCodecContext *c = ost->st->codec;

    /* check if we want to generate more frames */
    {
        AVRational r = { 1, 1 };
        if (av_compare_ts(ost->next_pts, ost->st->codec->time_base, STREAM_DURATION, r) >= 0)
        {
            return NULL;
        }
    }

    fill_yuv_image(ost->frame, ost->next_pts, c->width, c->height);

    ost->frame->pts = ost->next_pts++;

    return ost->frame;
}
(2) 视频编码
视频编码的方式同之前几次使用的方式相同,即调用avcodec_encode_video2,实现方法如:
/* encode the image */
ret = avcodec_encode_video2(c, &pkt, frame, &got_packet);
if (ret < 0)
{
    fprintf(stderr, "Error encoding video frame: %d\n", ret);
    exit(1);
}
(3) 写出编码后的数据到输出视频文件
这部分的实现过程很简单,方式如下:
/* rescale output packet timestamp values from codec to stream timebase */
av_packet_rescale_ts(pkt, *time_base, st->time_base);
pkt->stream_index = st->index;

/* Write the compressed frame to the media file. */
//    log_packet(fmt_ctx, pkt);
return av_interleaved_write_frame(fmt_ctx, pkt);
av_packet_rescale_ts函数的作用为不同time_base度量之间的转换,在这里起到的作用是将AVCodecContext的time_base转换为AVStream中的time_base。av_interleaved_write_frame函数的作用是写出AVPacket到输出文件。该函数的声明为:
int av_interleaved_write_frame(AVFormatContext *s, AVPacket *pkt);
该函数的声明也很简单,第一个参数是之前打开并写入文件头的文件句柄,第二个参数是写入文件的packet。返回值为错误码,成功返回0,失败则返回一个负值。
Write_video_frame函数的整体实现如:
int Write_video_frame(AVFormatContext *oc, OutputStream *ost)
{
    int ret;
    AVCodecContext *c;
    AVFrame *frame;
    int got_packet = 0;
    AVPacket pkt = { 0 };

    c = ost->st->codec;

    frame = get_video_frame(ost);

    av_init_packet(&pkt);

    /* encode the image */
    ret = avcodec_encode_video2(c, &pkt, frame, &got_packet);
    if (ret < 0)
    {
        fprintf(stderr, "Error encoding video frame: %d\n", ret);
        exit(1);
    }

    if (got_packet)
    {
        ret = write_frame(oc, &c->time_base, ost->st, &pkt);
    }
    else
    {
        ret = 0;
    }

    if (ret < 0)
    {
        fprintf(stderr, "Error while writing video frame: %d\n", ret);
        exit(1);
    }

    return (frame || got_packet) ? 0 : 1;
}
以上是写入一帧视频数据的方法,写入音频的方法于此大同小异。整个编码封装的循环上层实现如:
while (encode_video || encode_audio)
{
    /* select the stream to encode */
    if (encode_video && (!encode_audio || av_compare_ts(video_st.next_pts, video_st.st->codec->time_base, audio_st.next_pts, audio_st.st->codec->time_base) <= 0))
    {
        encode_video = !Write_video_frame(oc, &video_st);
        if (encode_video)
        {
            printf("Write %d video frame.\n", videoFrameIdx++);
        }
        else
        {
            printf("Video ended, exit.\n");
        }
    }
    else
    {
        encode_audio = !Write_audio_frame(oc, &audio_st);
        if (encode_audio)
        {
            printf("Write %d audio frame.\n", audioFrameIdx++);
        }
        else
        {
            printf("Audio ended, exit.\n");
        }
    }
}
###5. 写入文件尾,并进行收尾工作
写入文件尾的数据同写文件头一样简单,只需要调用函数av_write_trailer即可实现:
int av_write_trailer(AVFormatContext *s);
该函数只有一个参数即视频文件的句柄,当返回值为0时表示函数执行成功。
整个流程的收尾工作包括关闭文件中的数据流、关闭输出文件和释放AVCodecContext对象。其中关闭数据流的实现方式如:
void Close_stream(AVFormatContext *oc, OutputStream *ost)
{
    avcodec_close(ost->st->codec);
    av_frame_free(&ost->frame);
    av_frame_free(&ost->tmp_frame);
    sws_freeContext(ost->sws_ctx);
    swr_free(&ost->swr_ctx);
}
关闭输出文件和释放AVCodecContext对象:
if (!(fmt->flags & AVFMT_NOFILE))
    /* Close the output file. */
    avio_closep(&oc->pb);

/* free the stream */
avformat_free_context(oc);
至此,整个处理流程便结束了。正确设置输入的YUV文件就可以获取封装好的音视频文件。
##六、调用FFMpeg SDK实现视频文件的转封装
有时候我们可能会面对这样的一种需求,即我们不需要对视频内的音频或视频信号进行什么实际的操作,只是希望能把文件的封装格式进行转换,例如从avi转换为mp4格式或者flv格式等。实际上,转封装不需要对内部的音视频进行解码,只需要根据从输入文件中获取包含的数据流添加到输出文件中,然后将输入文件中的数据包按照规定格式写入到输出文件中去。
1、解析命令行参数
如同之前的工程一样,我们使用命令行参数传入输入和输出的文件名。为此,我们定义了如下的结构体和函数来实现传入输入输出文件的过程:
typedef struct _IOFiles
{
    const char *inputName;
    const char *outputName;
} IOFiles;

static bool hello(int argc, char **argv, IOFiles &io_param)
{
    printf("FFMpeg Remuxing Demo.\nCommand format: %s inputfile outputfile\n", argv[0]);
    if (argc != 3)
    {
        printf("Error: command line error, please re-check.\n");
        return false;
    }

    io_param.inputName = argv[1];
    io_param.outputName = argv[2];

    return true;
}
在main函数执行时,调用hello函数解析命令行并保存到IOFiles结构中:
int main(int argc, char **argv)
{
    IOFiles io_param;
    if (!hello(argc, argv, io_param))
    {
        return -1;
    }
    //......
}
2、所需要的结构与初始化操作
为了实现视频文件的转封装操作,我们需要以下的结构:
AVOutputFormat *ofmt = NULL;
AVFormatContext *ifmt_ctx = NULL, *ofmt_ctx = NULL;
AVPacket pkt;
然后所需要的初始化操作有打开输入视频文件、获取其中的流信息和获取输出文件的句柄:
av_register_all();

//按封装格式打开输入视频文件
if ((ret = avformat_open_input(&ifmt_ctx, io_param.inputName, NULL, NULL)) < 0)
{
    printf("Error: Open input file failed.\n");
    goto end;
}

//获取输入视频文件中的流信息
if ((ret = avformat_find_stream_info(ifmt_ctx, NULL)) < 0)
{
    printf("Error: Failed to retrieve input stream information.\n");
    goto end;
}
av_dump_format(ifmt_ctx, 0, io_param.inputName, 0);

//按照文件名获取输出文件的句柄
avformat_alloc_output_context2(&ofmt_ctx, NULL, NULL, io_param.outputName);
if (!ofmt_ctx)
{
    printf("Error: Could not create output context.\n");
    goto end;
}
ofmt = ofmt_ctx->oformat;
3、 向输出文件中添加Stream并打开输出文件
在我们获取到了输入文件中的流信息后,保持输入流中的codec不变,并以其为依据添加到输出文件中:
for (unsigned int i = 0; i < ifmt_ctx->nb_streams ; i++)
{
    AVStream *inStream = ifmt_ctx->streams[i];
    AVStream *outStream = avformat_new_stream(ofmt_ctx, inStream->codec->codec);
    if (!outStream)
    {
        printf("Error: Could not allocate output stream.\n");
        goto end;
    }

    ret = avcodec_copy_context(outStream->codec, inStream->codec);
    outStream->codec->codec_tag = 0;
    if (ofmt_ctx->oformat->flags & AVFMT_GLOBALHEADER)
    {
        outStream->codec->flags |= AV_CODEC_FLAG_GLOBAL_HEADER;
    }
}

av_dump_format(ofmt_ctx, 0, io_param.outputName, 1);
这里调用了函数avcodec_copy_context函数,该函数的声明如下:
int avcodec_copy_context(AVCodecContext *dest, const AVCodecContext *src);
该函数的作用是将src表示的AVCodecContext中的内容拷贝到dest中。
随后,调用avio_open函数打开输出文件:
av_dump_format(ofmt_ctx, 0, io_param.outputName, 1);

if (!(ofmt->flags & AVFMT_NOFILE))
{
    ret = avio_open(&ofmt_ctx->pb, io_param.outputName, AVIO_FLAG_WRITE);
    if (ret < 0)
    {
        printf("Error: Could not open output file.\n");
        goto end;
    }
}
4、写入文件的音视频数据
首先向输出文件中写入文件头:
ret = avformat_write_header(ofmt_ctx, NULL);
if (ret < 0)
{
    printf("Error: Could not write output file header.\n");
    goto end;
}
写入文件的视频和音频包数据,其实就是将音频和视频Packets从输入文件中读出来,正确设置pts和dts等时间量之后,再写入到输出文件中去:
while (1)
{
    AVStream *in_stream, *out_stream;

    ret = av_read_frame(ifmt_ctx, &pkt);
    if (ret < 0)
        break;

    in_stream  = ifmt_ctx->streams[pkt.stream_index];
    out_stream = ofmt_ctx->streams[pkt.stream_index];

    /* copy packet */
    pkt.pts = av_rescale_q_rnd(pkt.pts, in_stream->time_base, out_stream->time_base, (AVRounding)(AV_ROUND_NEAR_INF|AV_ROUND_PASS_MINMAX));
    pkt.dts = av_rescale_q_rnd(pkt.dts, in_stream->time_base, out_stream->time_base, (AVRounding)(AV_ROUND_NEAR_INF|AV_ROUND_PASS_MINMAX));
    pkt.duration = av_rescale_q(pkt.duration, in_stream->time_base, out_stream->time_base);
    pkt.pos = -1;

    ret = av_interleaved_write_frame(ofmt_ctx, &pkt);
    if (ret < 0)
    {
        fprintf(stderr, "Error muxing packet\n");
        break;
    }
    av_free_packet(&pkt);
}
最后要做的就是写入文件尾:
av_write_trailer(ofmt_ctx);
5、 收尾工作
写入输出文件完成后,需要对打开的结构进行关闭或释放等操作。主要有关闭输入输出文件、释放输出文件的句柄等:
avformat_close_input(&ifmt_ctx);

/* close output */
if (ofmt_ctx && !(ofmt->flags & AVFMT_NOFILE))
    avio_closep(&ofmt_ctx->pb);

avformat_free_context(ofmt_ctx);

if (ret < 0 && ret != AVERROR_EOF)
{
    fprintf(stderr, "Error failed to write packet to output file.\n");
    return 1;
}
##七、 FFMpeg实现视频水印
视频的水印通常指附加在原始视频上的可见或者不可见的,与原始视频无直接关联的标识。通常在有线电视画面上电视台的台标以及视频网站上的logo就是典型的视频水印的应用场景。通常实现视频水印可以通过FFMpeg提供的libavfilter库实现。libavfilter库实际上实现的是视频的滤镜功能,除了水印之外,还可以实现视频帧的灰度化、平滑、翻转、直方图均衡、裁剪等操作。
我们这里实现的视频水印等操作,完全在视频像素域实现,即从一个yuv文件中读取数据到AVFrame结构,对AVFrame结构进行处理后再输出到另一个yuv文件。中间不涉及封装或编码解码等操作。
###1. 解析命令行,获取输入输出文件信息
我们通过与之前类似的方式,在命令行中获取输入、输出文件名,图像宽高。首先定义如下的结构体用于保存配置信息:
typedef struct _IOFiles
{
    const char *inputFileName;        //输入文件名
    const char *outputFileName;        //输出文件名

    FILE *iFile;                    //输入文件指针
    FILE *oFile;                    //输出文件指针

    uint8_t filterIdx;                //Filter索引

    unsigned int frameWidth;        //图像宽度
    unsigned int frameHeight;        //图像高度
}IOFiles;
在这个结构体中,filterIdx用于表示当前工程选择哪一种filter,即希望实现哪一种功能。
在进入main函数之后,调用hello函数来解析命令行参数:
static int hello(int argc, char **argv, IOFiles &files)
{
    if (argc < 4)
    {
        printf("usage: %s output_file input_file filter_index\n"
            "Filter index:.\n"
            "1. Color component\n"
            "2. Blur\n"
            "3. Horizonal flip\n"
            "4. HUE\n"
            "5. Crop\n"
            "6. Box\n"
            "7. Text\n"
            "\n", argv[0]);

        return -1;
    }

    files.inputFileName = argv[1];
    files.outputFileName = argv[2];
    files.frameWidth = atoi(argv[3]);
    files.frameHeight = atoi(argv[4]);
    files.filterIdx = atoi(argv[5]);

    fopen_s(&files.iFile, files.inputFileName, "rb+");
    if (!files.iFile)
    {
        printf("Error: open input file failed.\n");
        return -1;
    }

    fopen_s(&files.oFile, files.outputFileName, "wb+");
    if (!files.oFile)
    {
        printf("Error: open output file failed.\n");
        return -1;
    }

    return 0;
}
该函数实现了输入输出文件的文件名获取并打开,并读取filter索引。
###2. Video Filter初始化
在进行初始化之前,必须调用filter的init函数,之后才能针对Video Filter进行各种操作。其声明如下:
void avfilter_register_all(void);
为了实现视频水印的功能,所需要的相关结构主要有:
AVFilterContext *buffersink_ctx;
AVFilterContext *buffersrc_ctx;
AVFilterGraph *filter_graph;
其中AVFilterContext用于表示一个filter的实例上下文,AVFilterGraph表示一个video filtering的工作流。Video Filter的初始化实现如以下函数:
//初始化video filter相关的结构
int Init_video_filter(const char *filter_descr, int width, int height)
{
    char args[512];
    AVFilter *buffersrc  = avfilter_get_by_name("buffer");
    AVFilter *buffersink = avfilter_get_by_name("buffersink");
    AVFilterInOut *outputs = avfilter_inout_alloc();
    AVFilterInOut *inputs  = avfilter_inout_alloc();
    enum AVPixelFormat pix_fmts[] = { AV_PIX_FMT_YUV420P, AV_PIX_FMT_NONE };
    AVBufferSinkParams *buffersink_params;

    filter_graph = avfilter_graph_alloc();

    /* buffer video source: the decoded frames from the decoder will be inserted here. */
    snprintf(args, sizeof(args), "video_size=%dx%d:pix_fmt=%d:time_base=%d/%d:pixel_aspect=%d/%d", width,height,AV_PIX_FMT_YUV420P, 1, 25,1,1);
    int ret = avfilter_graph_create_filter(&buffersrc_ctx, buffersrc, "in", args, NULL, filter_graph);
    if (ret < 0)
    {
        printf("Error: cannot create buffer source.\n");
        return ret;
    }

    /* buffer video sink: to terminate the filter chain. */
    buffersink_params = av_buffersink_params_alloc();
    buffersink_params->pixel_fmts = pix_fmts;
    ret = avfilter_graph_create_filter(&buffersink_ctx, buffersink, "out", NULL, buffersink_params, filter_graph);
    av_free(buffersink_params);
    if (ret < 0)
    {
        printf("Error: cannot create buffer sink\n");
        return ret;
    }

    /* Endpoints for the filter graph. */
    outputs->name       = av_strdup("in");
    outputs->filter_ctx = buffersrc_ctx;
    outputs->pad_idx    = 0;
    outputs->next       = NULL;

    inputs->name       = av_strdup("out");
    inputs->filter_ctx = buffersink_ctx;
    inputs->pad_idx    = 0;
    inputs->next       = NULL;

    if ((ret = avfilter_graph_parse_ptr(filter_graph, filter_descr,    &inputs, &outputs, NULL)) < 0)
    {
        printf("Error: avfilter_graph_parse_ptr failed.\n");
        return ret;
    }

    if ((ret = avfilter_graph_config(filter_graph, NULL)) < 0)
    {
        printf("Error: avfilter_graph_config");
        return ret;
    }

    return 0;
}
###3. 初始化输入输出AVFrame并分配内存
我们首先声明AVFrame类型的对象和指向像素缓存的指针:
AVFrame *frame_in = NULL;
AVFrame *frame_out = NULL;
unsigned char *frame_buffer_in = NULL;
unsigned char *frame_buffer_out = NULL;
然后分配AVFrame对象,并分配其中的缓存区:
void Init_video_frame_in_out(AVFrame **frameIn, AVFrame **frameOut, unsigned char **frame_buffer_in, unsigned char **frame_buffer_out, int frameWidth, int frameHeight)
{
    *frameIn = av_frame_alloc();
    *frame_buffer_in = (unsigned char *)av_malloc(av_image_get_buffer_size(AV_PIX_FMT_YUV420P, frameWidth,frameHeight,1));
    av_image_fill_arrays((*frameIn)->data, (*frameIn)->linesize,*frame_buffer_in, AV_PIX_FMT_YUV420P,frameWidth,frameHeight,1);

    *frameOut = av_frame_alloc();
    *frame_buffer_out = (unsigned char *)av_malloc(av_image_get_buffer_size(AV_PIX_FMT_YUV420P, frameWidth,frameHeight,1));
    av_image_fill_arrays((*frameOut)->data, (*frameOut)->linesize,*frame_buffer_out, AV_PIX_FMT_YUV420P,frameWidth,frameHeight,1);

    (*frameIn)->width = frameWidth;
    (*frameIn)->height = frameHeight;
    (*frameIn)->format = AV_PIX_FMT_YUV420P;
}
###4. Video Filtering循环体
这一部分主要包括三大部分:
- 读取原始的YUV数据到输入的frame;
- 使用预先定义好的filter_graph处理输入frame,生成输出frame;
- 将输出frame中的像素值写入输出yuv文件;
第一部分,读取原始yuv的实现由自定义函数Read_yuv_data_to_buf实现:
//从输入yuv文件中读取数据到buffer和frame结构
bool Read_yuv_data_to_buf(unsigned char *frame_buffer_in, const IOFiles &files, AVFrame **frameIn)
{
    AVFrame *pFrameIn = *frameIn;
    int width = files.frameWidth, height = files.frameHeight;
    int frameSize = width * height * 3 / 2;

    if (fread_s(frame_buffer_in, frameSize, 1, frameSize, files.iFile) != frameSize)
    {
        return false;
    }

    pFrameIn->data[0] = frame_buffer_in;
    pFrameIn->data[1] = pFrameIn->data[0] + width * height;
    pFrameIn->data[2] = pFrameIn->data[1] + width * height / 4;

    return true;
}
第二部分实际上分为两部分,即将输入frame送入filter graph,以及从filter graph中取出输出frame。实现方法分别为:
//将待处理的输入frame添加进filter graph
bool Add_frame_to_filter(AVFrame *frameIn)
{
    if (av_buffersrc_add_frame(buffersrc_ctx, frameIn) < 0)
    {
        return false;
    }

    return true;
}

//从filter graph中获取输出frame
int Get_frame_from_filter(AVFrame **frameOut)
{
    if (av_buffersink_get_frame(buffersink_ctx, *frameOut) < 0)
    {
        return false;
    }

    return true;
}
第三部分,写出输出frame到输出yuv文件:
//从输出frame中写出像素数据到输出文件
void Write_yuv_to_outfile(const AVFrame *frame_out, IOFiles &files)
{
    if(frame_out->format==AV_PIX_FMT_YUV420P)
    {
        for(int i=0;i<frame_out->height;i++)
        {
            fwrite(frame_out->data[0]+frame_out->linesize[0]*i,1,frame_out->width,files.oFile);
        }
        for(int i=0;i<frame_out->height/2;i++)
        {
            fwrite(frame_out->data[1]+frame_out->linesize[1]*i,1,frame_out->width/2,files.oFile);
        }
        for(int i=0;i<frame_out->height/2;i++)
        {
            fwrite(frame_out->data[2]+frame_out->linesize[2]*i,1,frame_out->width/2,files.oFile);
        }
    }
}
该部分的综合实现如下:
while (Read_yuv_data_to_buf(frame_buffer_in, files, &frame_in))
{
    //将输入frame添加到filter graph
    if (!Add_frame_to_filter(frame_in))
    {
        printf("Error while adding frame.\n");
        goto end;
    }

    //从filter graph中获取输出frame
    if (!Get_frame_from_filter(&frame_out))
    {
        printf("Error while getting frame.\n");
        goto end;
    }

    //将输出frame写出到输出文件
    Write_yuv_to_outfile(frame_out, files);

    printf("Process 1 frame!\n");
    av_frame_unref(frame_out);
}
###5、 收尾工作
整体实现完成后,需要进行善后的收尾工作有释放输入和输出frame、关闭输入输出文件,以及释放filter graph:
//关闭文件及相关结构
fclose(files.iFile);
fclose(files.oFile);

av_frame_free(&frame_in);
av_frame_free(&frame_out);

avfilter_graph_free(&filter_graph);
八、 FFMpeg实现视频缩放
视频缩放是视频开发中一项最基本的功能。通过对视频的像素数据进行采样或插值,可以将低分辨率的视频转换到更高的分辨率,或者将高分辨率的视频转换为更低的分辨率。通过FFMpeg提供了libswscale库,可以轻松实现视频的分辨率转换功能。除此之外,libswscale库还可以实现颜色空间转换等功能。
通常情况下视频缩放的主要思想是对视频进行解码到像素域后,针对像素域的像素值进行采样或差值操作。这种方式需要在解码端消耗一定时间,但是通用性最好,不需要对码流格式作出任何特殊处理。在FFMpeg中libswscale库也是针对AVFrame结构进行缩放处理。
1. 解析命令行参数
输入输出的数据使用以下结构进行封装:
typedef struct _IOFiles
{
    char *inputName;            //输入文件名
    char *outputName;            //输出文件名
    char *inputFrameSize;        //输入图像的尺寸
    char *outputFrameSize;        //输出图像的尺寸

    FILE *iFile;                //输入文件指针
    FILE *oFile;                //输出文件指针

} IOFiles;
输入参数解析过程为:
static bool hello(int argc, char **argv, IOFiles &files)
{
    printf("FFMpeg Scaling Demo.\nCommand format: %s input_file input_frame_size output_file output_frame_size\n", argv[0]);
    if (argc != 5)
    {
        printf("Error: command line error, please re-check.\n");
        return false;
    }

    files.inputName = argv[1];
    files.inputFrameSize = argv[2];
    files.outputName = argv[3];
    files.outputFrameSize = argv[4];

    fopen_s(&files.iFile, files.inputName, "rb+");
    if (!files.iFile)
    {
        printf("Error: cannot open input file.\n");
        return false;
    }

    fopen_s(&files.oFile, files.outputName, "wb+");
    if (!files.oFile)
    {
        printf("Error: cannot open output file.\n");
        return false;
    }

    return true;
}
在参数读入完成后,需要从表示视频分辨率的字符串中解析出图像的宽和高两个值。我们在命令行中传入的视频分辨率字符串的格式为“width x height”,例如”720x480”。解析过程需要调用av_parse_video_size函数。声明如下:
int av_parse_video_size(int *width_ptr, int *height_ptr, const char *str);
例如,我们传入下面的参数:
int frameWidth, frameHeight;
av_parse_video_size(&frameWidth, &frameHeight, "720x480");
函数将分别把720和480传入frameWidth和frameHeight中。
在获取命令行参数后,调用该函数解析图像分辨率:
int srcWidth, srcHeight, dstWidth, dstHeight;
if (av_parse_video_size(&srcWidth, &srcHeight, files.inputFrameSize))
{
    printf("Error: parsing input size failed.\n");
    goto end;
}
if (av_parse_video_size(&dstWidth, &dstHeight, files.outputFrameSize))
{
    printf("Error: parsing output size failed.\n");
    goto end;
}
这样,我们就获得了源和目标图像的宽和高度。
2. 创建SwsContext结构
进行视频的缩放操作离不开libswscale的一个关键的结构,即SwsContext,该结构提供了缩放操作的必要参数。创建该结构需调用函数sws_getContext。该函数的声明如下:
struct SwsContext *sws_getContext(int srcW, int srcH, enum AVPixelFormat srcFormat,
                                  int dstW, int dstH, enum AVPixelFormat dstFormat,
                                  int flags, SwsFilter *srcFilter,
                                  SwsFilter *dstFilter, const double *param);
该函数的前两行参数分别表示输入和输出图像的宽、高、像素格式,参数flags表示采样和差值使用的算法,常用的有SWS_BILINEAR表示双线性差值等。剩余的不常用参数通常设为NULL。创建该结构的代码如:
//创建SwsContext结构
enum AVPixelFormat src_pix_fmt = AV_PIX_FMT_YUV420P;
enum AVPixelFormat dst_pix_fmt = AV_PIX_FMT_YUV420P;
struct SwsContext *sws_ctx = sws_getContext(srcWidth, srcHeight, src_pix_fmt, dstWidth, dstHeight, dst_pix_fmt, SWS_BILINEAR, NULL,NULL,NULL );
if (!sws_ctx)
{
    printf("Error: parsing output size failed.\n");
    goto end;
}
3. 分配像素缓存
视频缩放实际上是在像素域实现,但是实际上我们没有必要真的建立一个个AVFrame对象,我们只需要其像素缓存空间即可,我们定义两个指针数组和两个保存stride的数组,并为其分配内存区域:
//分配input和output
uint8_t *src_data[4], *dst_data[4];
int src_linesize[4], dst_linesize[4];
if ((ret = av_image_alloc(src_data, src_linesize, srcWidth, srcHeight, src_pix_fmt, 32)) < 0)
{
    printf("Error: allocating src image failed.\n");
    goto end;
}
if ((ret = av_image_alloc(dst_data, dst_linesize, dstWidth, dstHeight, dst_pix_fmt, 1)) < 0)
{
    printf("Error: allocating dst image failed.\n");
    goto end;
}
4. 循环处理输入frame
循环处理的代码为:
//从输出frame中写出到输出文件
int dst_bufsize = ret;
for (int idx = 0; idx < MAX_FRAME_NUM; idx++)
{
    read_yuv_from_ifile(src_data, src_linesize, srcWidth, srcHeight, 0, files);
    read_yuv_from_ifile(src_data, src_linesize, srcWidth, srcHeight, 1, files);
    read_yuv_from_ifile(src_data, src_linesize, srcWidth, srcHeight, 2, files);

    sws_scale(sws_ctx, (const uint8_t * const*)src_data, src_linesize, 0, srcHeight, dst_data, dst_linesize);

    fwrite(dst_data[0], 1, dst_bufsize, files.oFile);
}
其核心函数为sws_scale,其声明为:
int sws_scale(struct SwsContext *c, const uint8_t *const srcSlice[],
          const int srcStride[], int srcSliceY, int srcSliceH,
          uint8_t *const dst[], const int dstStride[]);
该函数的各个参数比较容易理解,除了第一个是之前创建的SwsContext之外,其他基本上都是源和目标图像的缓存区和大小等。在写完一帧后,调用fwrite将输出的目标图像写入输出yuv文件中。
5. 收尾工作
收尾工作除了释放缓存区和关闭输入输出文件之外,就是需要释放SwsContext结构,需调用函数:sws_freeContext。实现过程为:
fclose(files.iFile);
fclose(files.oFile);
av_freep(&src_data[0]);
av_freep(&dst_data[0]);
sws_freeContext(sws_ctx);